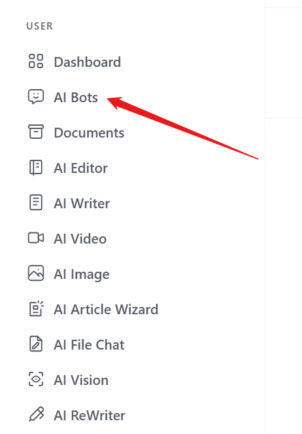
After installing the extension, you should see AI Bots item on your menu, click on it.
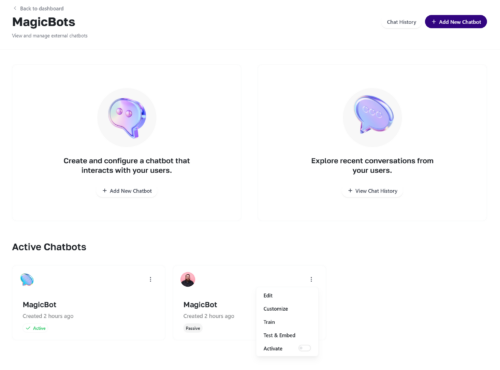
On the AI Bots page, you can create new chatbots, view chat history and manage your existing chatbots.
The External Chatbot extension allows you to create a specially trained Chatbot and embed it on external websites.
After installing the extension, you should see AI Bots item on your menu, click on it.
On the AI Bots page, you can create new chatbots, view chat history and manage your existing chatbots.
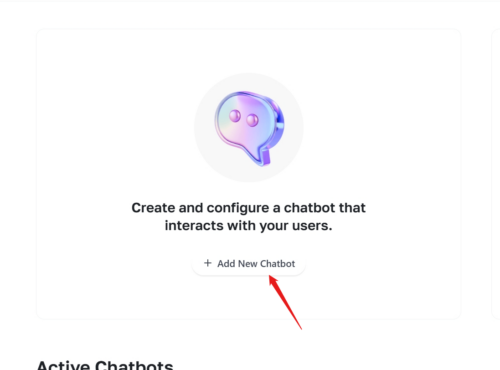
Click on the Add New Chatbot button.
Configuring Chatbot
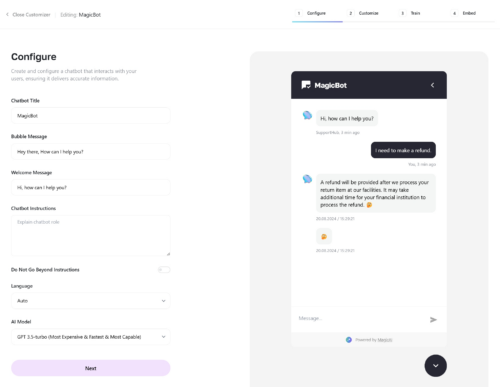
Chatbot Title: Set the name of your chatbot
Bubble Message: Customize the text shown in a bubble when the chat window is minimized.
Welcome message: The first message your chatbot will send to the user when a new chat window is initiated.
Chatbot Instructions: Define how the chatbot should behave.
Example: You are an AI support assistant for CarcaniAI. Act professionally. Add “If there is anything else I can help with, feel free to let me know!” at the end of your answers.
Do Not Go Beyond Instructions: Enable this if you want the AI to strictly follow your instructions.
Language: Select your chatbot’s language.
AI Model: Select the AI Model your chatbot will use.
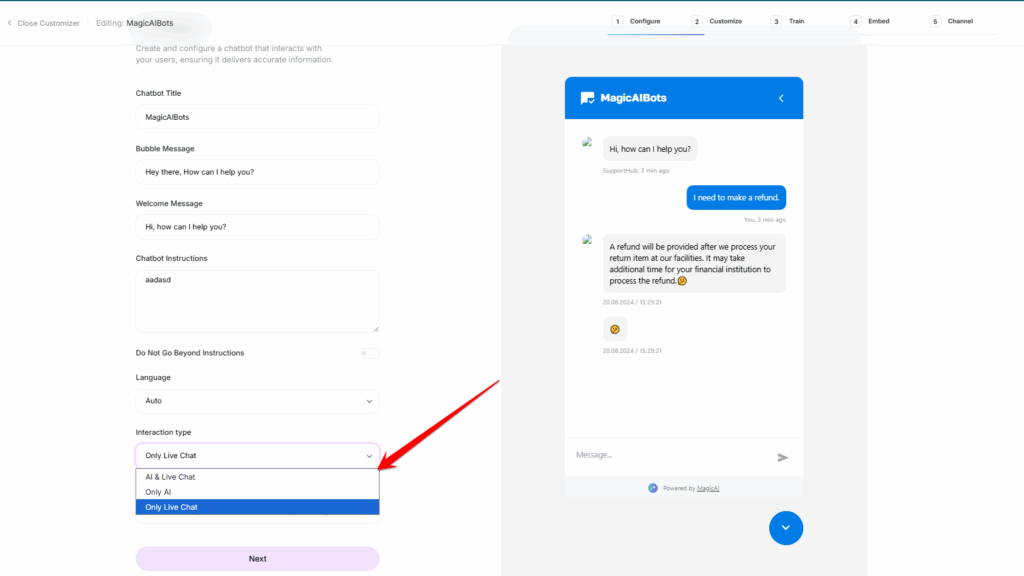
Interaction Type – Choose whether you want the chatbot to operate only with AI, or with both AI and a Live Chat Agent. Enabling the Live Chat Agent option allows users to interact directly with a human agent. (Note: The Human Agent extension must be enabled to use this feature.)
Connect Message – This is the message that will be displayed when the AI transfers the conversation to a live agent.
Customizing Chatbot
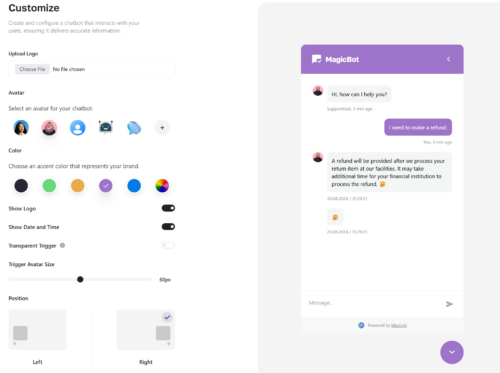
In this step, you can customize your chatbot as you wish. You can see a live preview of your changes on the right side of the page.
Training Chatbot
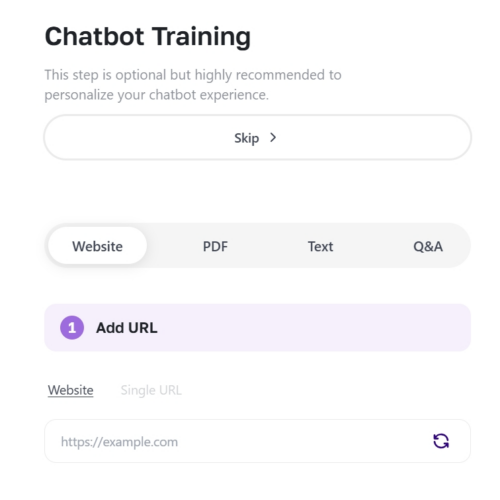
In this step you can train your chatbot. You can use a website, file or text as a source.
Embedding chatbot code on your site
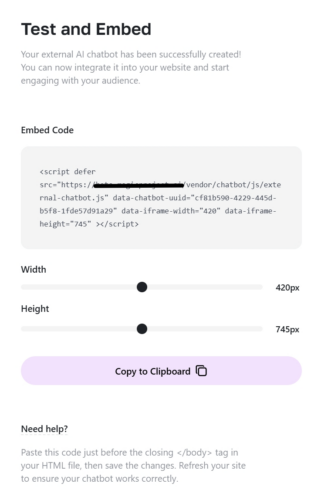
Copy the code from the page and add it before the closing </body> tag of your site. Once done, your chatbot is ready to interact with users.
Email Collection: To collect emails, enable the email collection feature on the Customize Chatbot page. This allows the chatbot to gather user emails seamlessly during conversations.
Emojis in Chat: Customize the chatbot’s communication style to include emojis in the chat flow. This feature can be configured within the chatbot’s settings to enhance user engagement.
File Attachments: To allow users to send file attachments during live conversations, adjust the conversation settings in the chatbot’s configuration. This provides a more interactive support experience.
Add/Edit Knowledge Base Articles: Access the Knowledge Base menu to add or edit articles. These articles can then be enabled and integrated into the chatbot’s conversation flow through the Customize Chatbot page.
Add/Edit Links: Add/Edit Links: You can now add and edit custom links directly within the Customize Chatbot.
New CRM Inbox for External Chatbot: The new CRM Inbox offers a fresh user interface (UI) for managing agent chats. It enhances the chat management experience with the following features:
Agent Chat Management: View, manage, and respond to live chat conversations directly from the CRM Inbox.
Real-Time Updates: Get instant updates on ongoing chats and new incoming messages.
Add/Edit Contacts: You can add and edit contacts directly within the chatbot interface through the Manage Contacts page. This makes it easier to keep track of user information.
Real-Time Inbox Notifications:
Enable real-time inbox notifications on the notification settings page. This ensures that human agents are instantly alerted when new messages arrive, improving responsiveness and support efficiency.
1- Email Collection: Enable the email collection feature under the Customize Chatbot section.
2- Emojis: Customize the chatbot’s communication style to include emojis in the chat flow.
3- Real-Time Inbox Notifications: Ensure that inbox notifications are enabled for agents through the notification settings page.
4- File Attachments: Allow file attachments by adjusting the settings in the chatbot’s conversation settings.
5- Add/Edit Contacts: You can add and edit user contact information directly from the Manage Contacts page in the chatbot’s settings.
6- Knowledge Base Articles: Access and manage knowledge base articles through the Knowledge Base menu. Enable relevant articles through the Customize Chatbot page.
7- Add/Edit Links: To manage links, navigate to the Customize Chatbot page and add/edit any links as needed.